- Inside Scuba
- Posts
- Whispering with Light: Moving Beyond Traditional Snoot Photography
Whispering with Light: Moving Beyond Traditional Snoot Photography
Byron Conroy
January 11, 2026
I hear a lot of photographers saying they don’t like snoots, but I believe that, like all tools, they are great when used wisely. I don’t like condemning a technique or a tool just because there are images out there where the technique has been butchered. Snoots done poorly are a bad look; a wide spotlight of light around a subject against a black background creates a boring and artificial image. However, for many of my snoot images, most people wouldn’t even be able to tell a snoot was used.
In underwater photography, there is an old saying: the best lighting is often the lighting you can’t see. Your lighting should be subtle and gently fade into the image instead of coming in like a wrecking ball. This is true no matter what technique you use, yet snoots often over-dramatize inefficiencies in technique.
Traditional snoot use creates a theatrical spotlight effect, isolating a subject with such force that subtlety is lost. Hard-edged spotlights, obvious cones of illumination, and pools of brightness surrounded by darkness—these images can feel impressive at first, but they rarely age well.
While that forceful approach has its place when learning, it represents only a narrow slice of what snoots are capable of. Used more thoughtfully, snoots can become one of the most refined lighting tools available to underwater photographers, shaping light in ways that feel natural, intentional, and almost invisible.
The problem with obvious snooting is not technical, but aesthetic. When the light is too direct and too harsh, the image starts to feel artificial. The underwater world rarely presents itself in perfect circles of illumination, and when our lighting does, the illusion breaks. Viewers may not consciously understand why an image feels staged, but they sense it immediately. Subtle lighting, on the other hand, draws attention without demanding it. It guides the eye gently, allowing the subject to exist within its environment rather than being cut out from it. This is where snoots, used wisely, begin to show their real strength.
Using a snoot can be frustrating, especially when you first start out. In the beginning, you’re just happy to get the light on the subject, and the initial impact of achieving your goal can overpower any impartiality you might have when reviewing your own images. But after you have achieved this a few times, the shots can become stale and start to look the same: a centered animal with a spotlight of light around it and a black background. This article aims to show you that it’s not the snoot’s fault… there are much better ways to use them.

If you can get away from the traditional spotlight effect then you can take snooting to a whole new level.
So What is a Snoot?
At its most basic level, a snoot is simply a device that restricts and shapes the beam of a strobe. By narrowing the light output, it allows the photographer to control exactly where light falls and—just as importantly—where it does not. Snoots come in many forms, from fixed tubes to adjustable optical systems that use lenses to focus light with remarkable precision. Some produce hard-edged beams, while others allow for softer transitions. Regardless of the design, the principle is the same: a snoot provides control. It transforms a strobe from a blunt instrument into a scalpel.
Understanding how a snoot works is essential to using it creatively rather than defensively. Small movements of the strobe result in significant changes in where the light lands. Distance also matters. Move the snoot closer to the subject and the beam tightens; pull it back and the light spreads, softening the edges and transitions. This relationship between distance, beam width, and falloff is where subtlety is born.
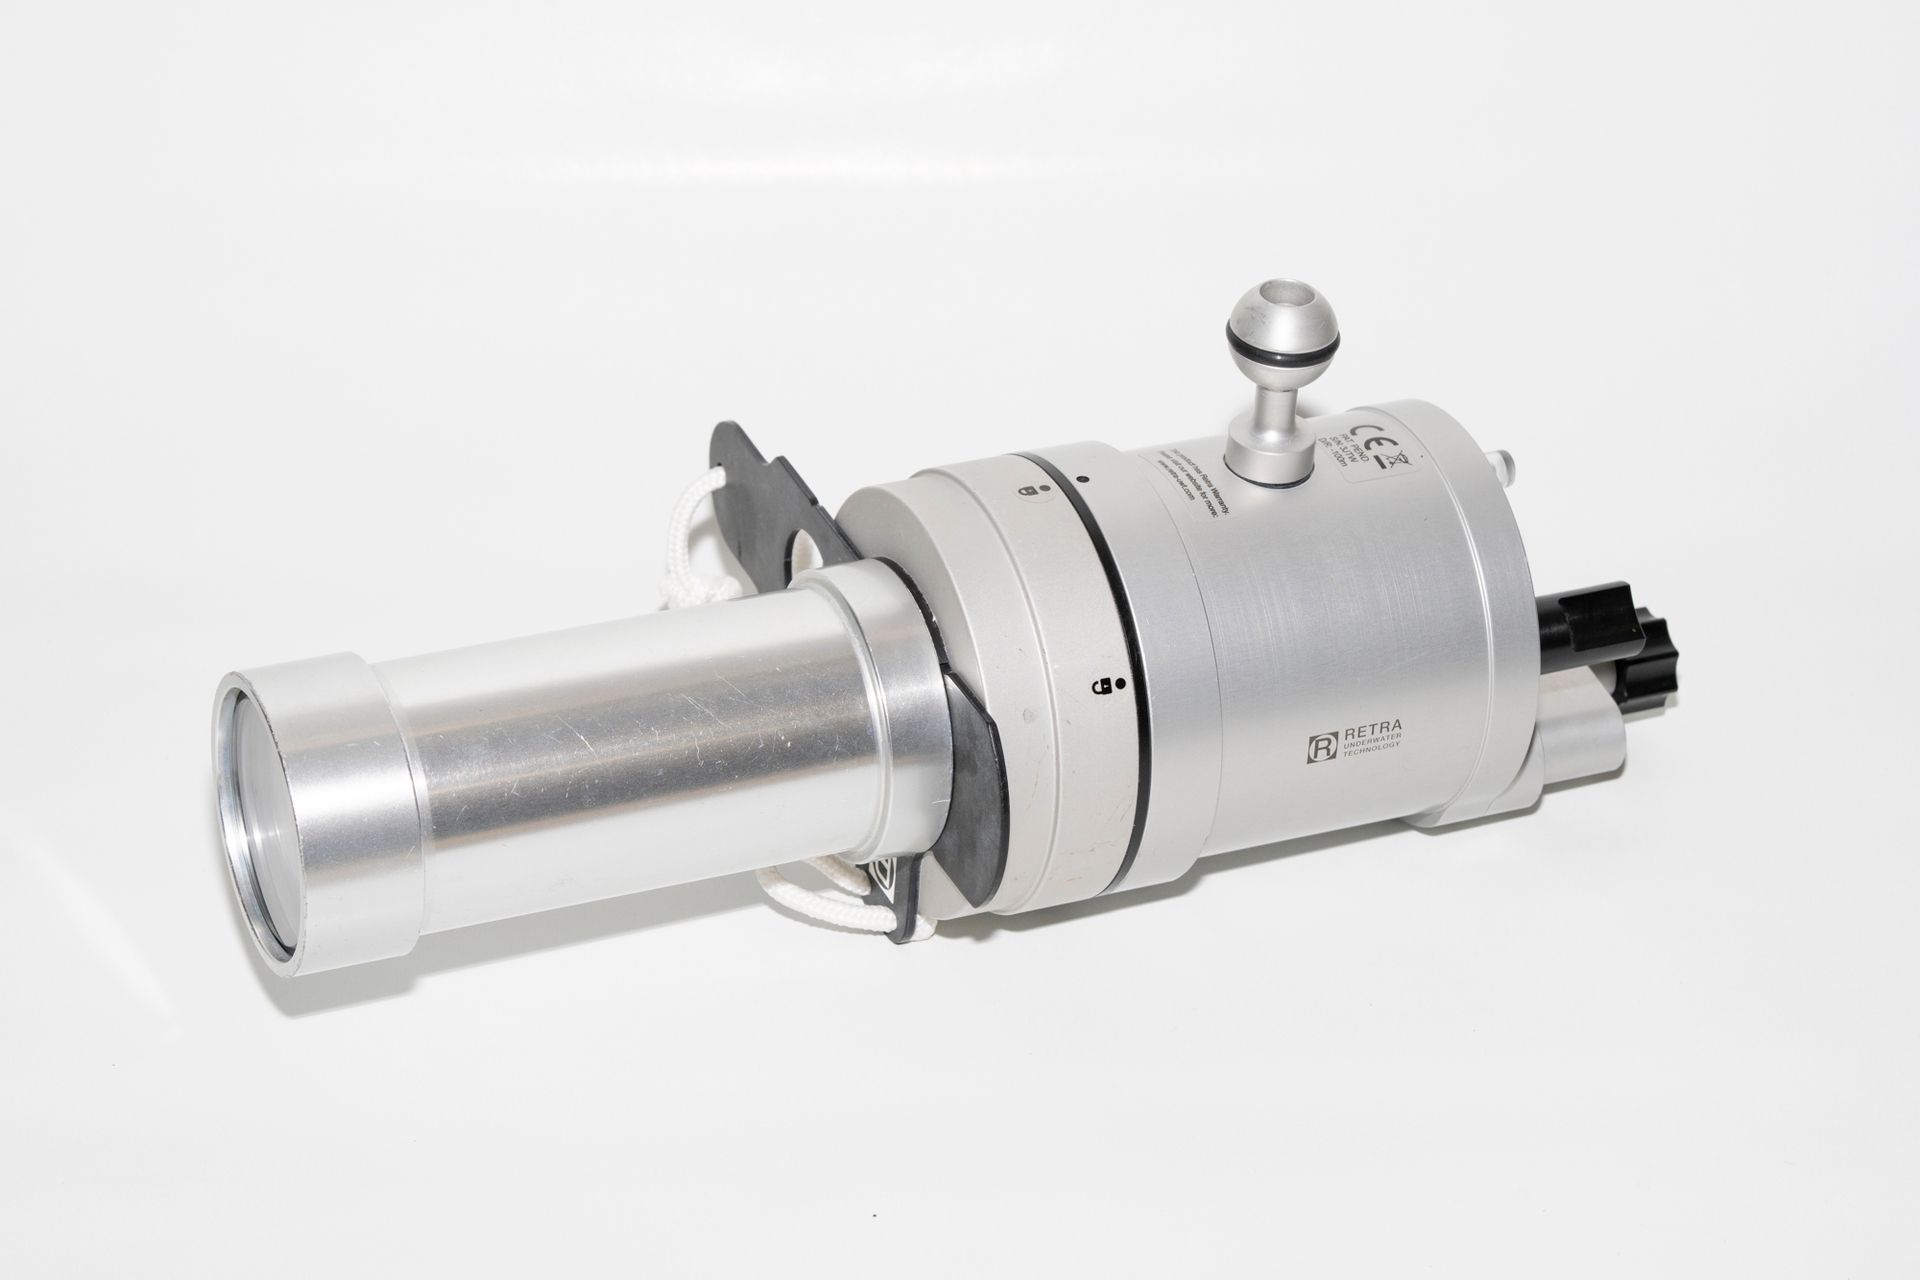
Retra Pro Max with the Retra LSD
How to Use Them?
For a full, detailed breakdown of how to set up a snoot, please read our previous article; this piece is designed to take that knowledge to the next level.
The number one piece of advice I can give you when using a snoot is to ensure that the beam of light is smaller than your subject when it makes contact. This will instantly make the "spotlight" effect disappear, giving your images a much more natural feel. Your shots will transition from having a visible halo to simply showing the subject against a pure black background. Once you have that dialed in, you can play with other settings to further refine your images.

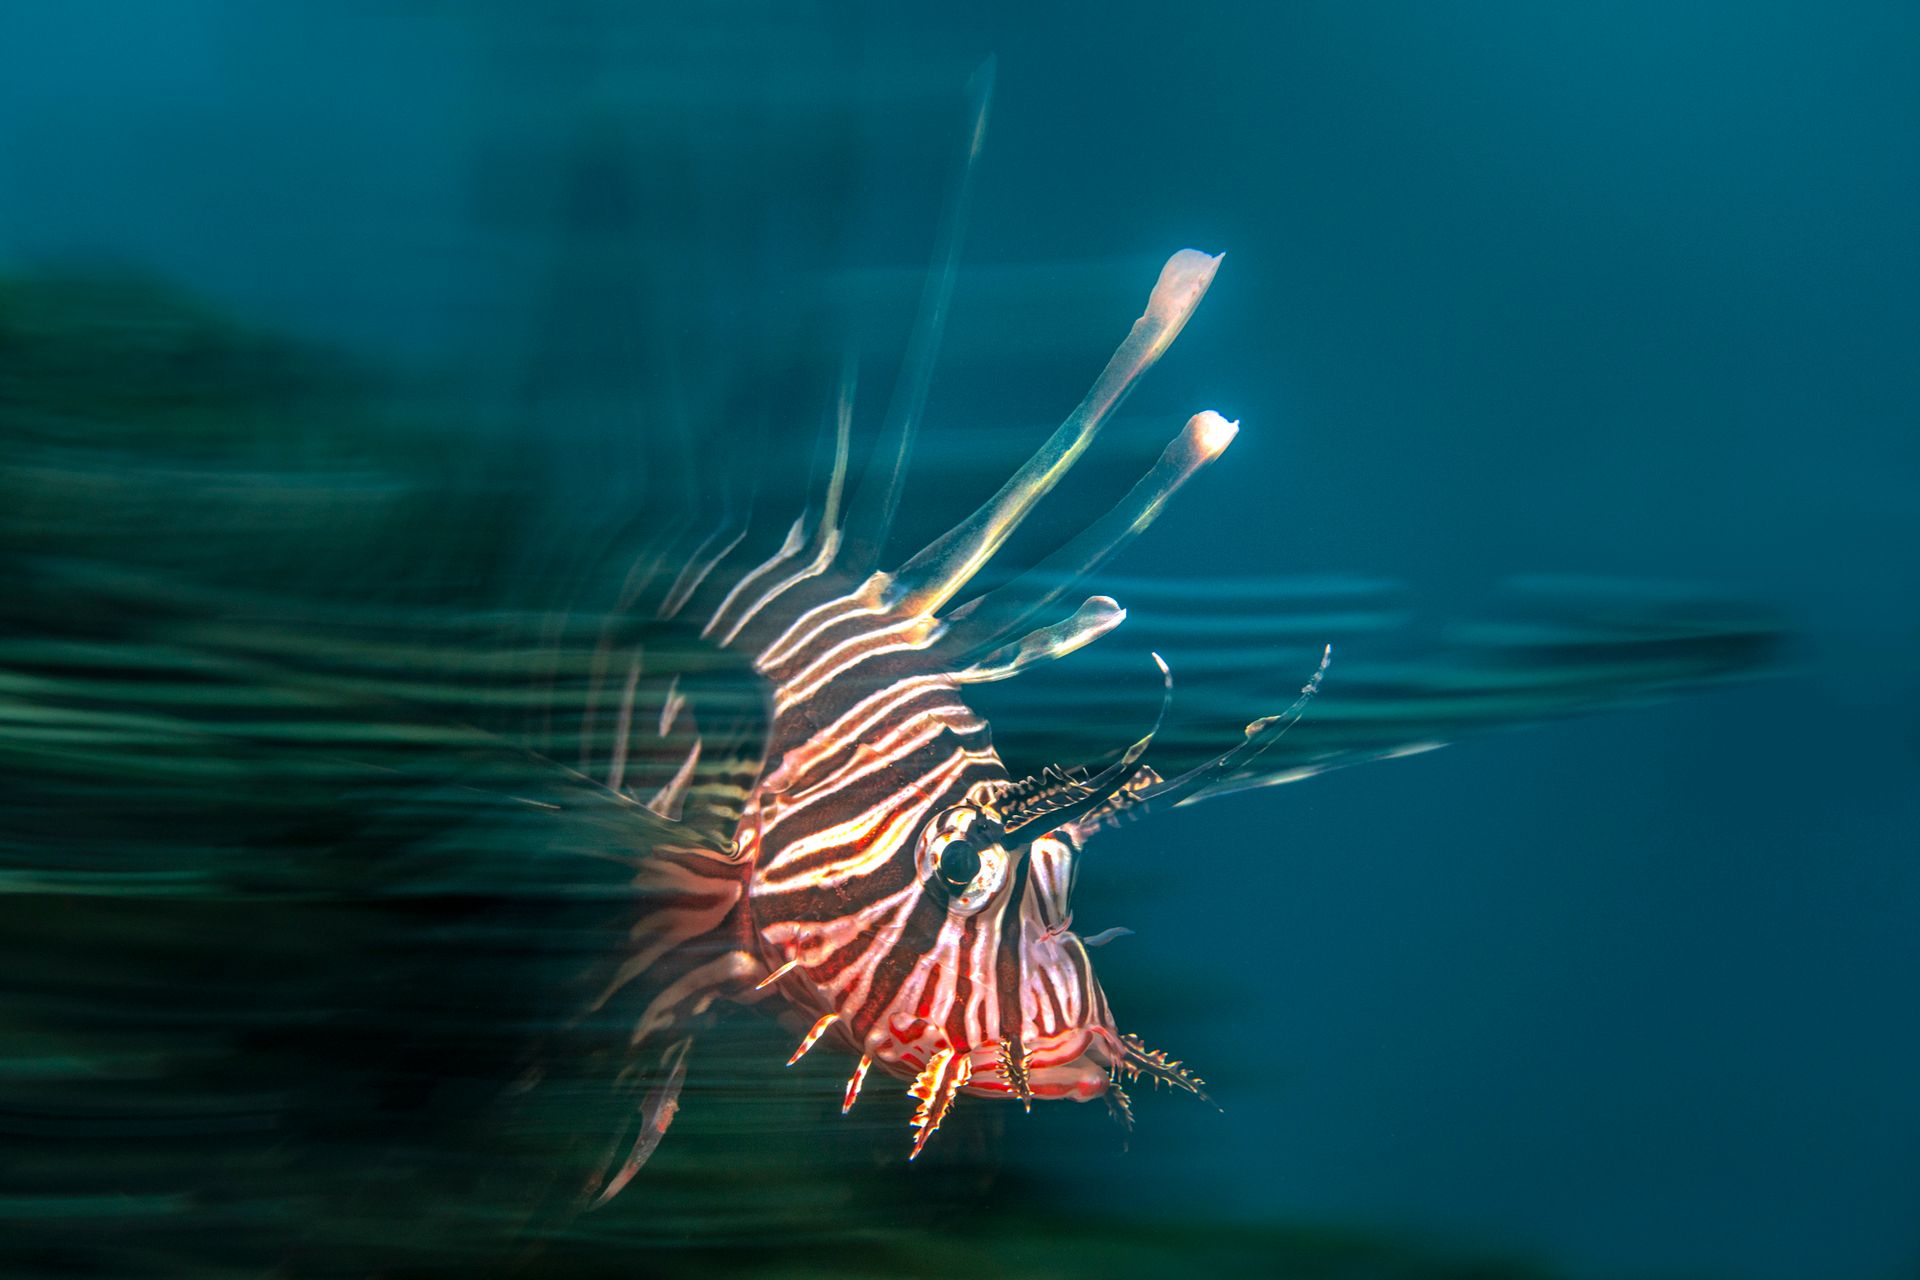
Snoots are great for black backgrounds, but even better if you manage to get rid of the Halo of light
Blue Background Snoot Photography
By using subtle snoot lighting, you can move away from traditional "safe" settings—like f/18 and 1/200—which produce a black background, and instead try incorporating blue backgrounds into your snooted images. This works especially well when the subject is perched above the seabed or reef with open water behind it. However, even when used on the seabed, this technique will bring blue tones into your image rather than maintaining the all-black look throughout your macro portfolio.
To achieve this, we need to introduce ambient light. Slow down your shutter speed while keeping it fast enough to ensure the image remains sharp—perhaps as slow as 1/50. Check the color of the water; the blues should get brighter as you slow your shutter. If you need them brighter still, open up your aperture. Keep in mind that as you open the aperture, you also let in more strobe light; therefore, you will need to decrease the strobe power on your snoot to compensate. These blue-background snoot shots feel much more natural and integrated.
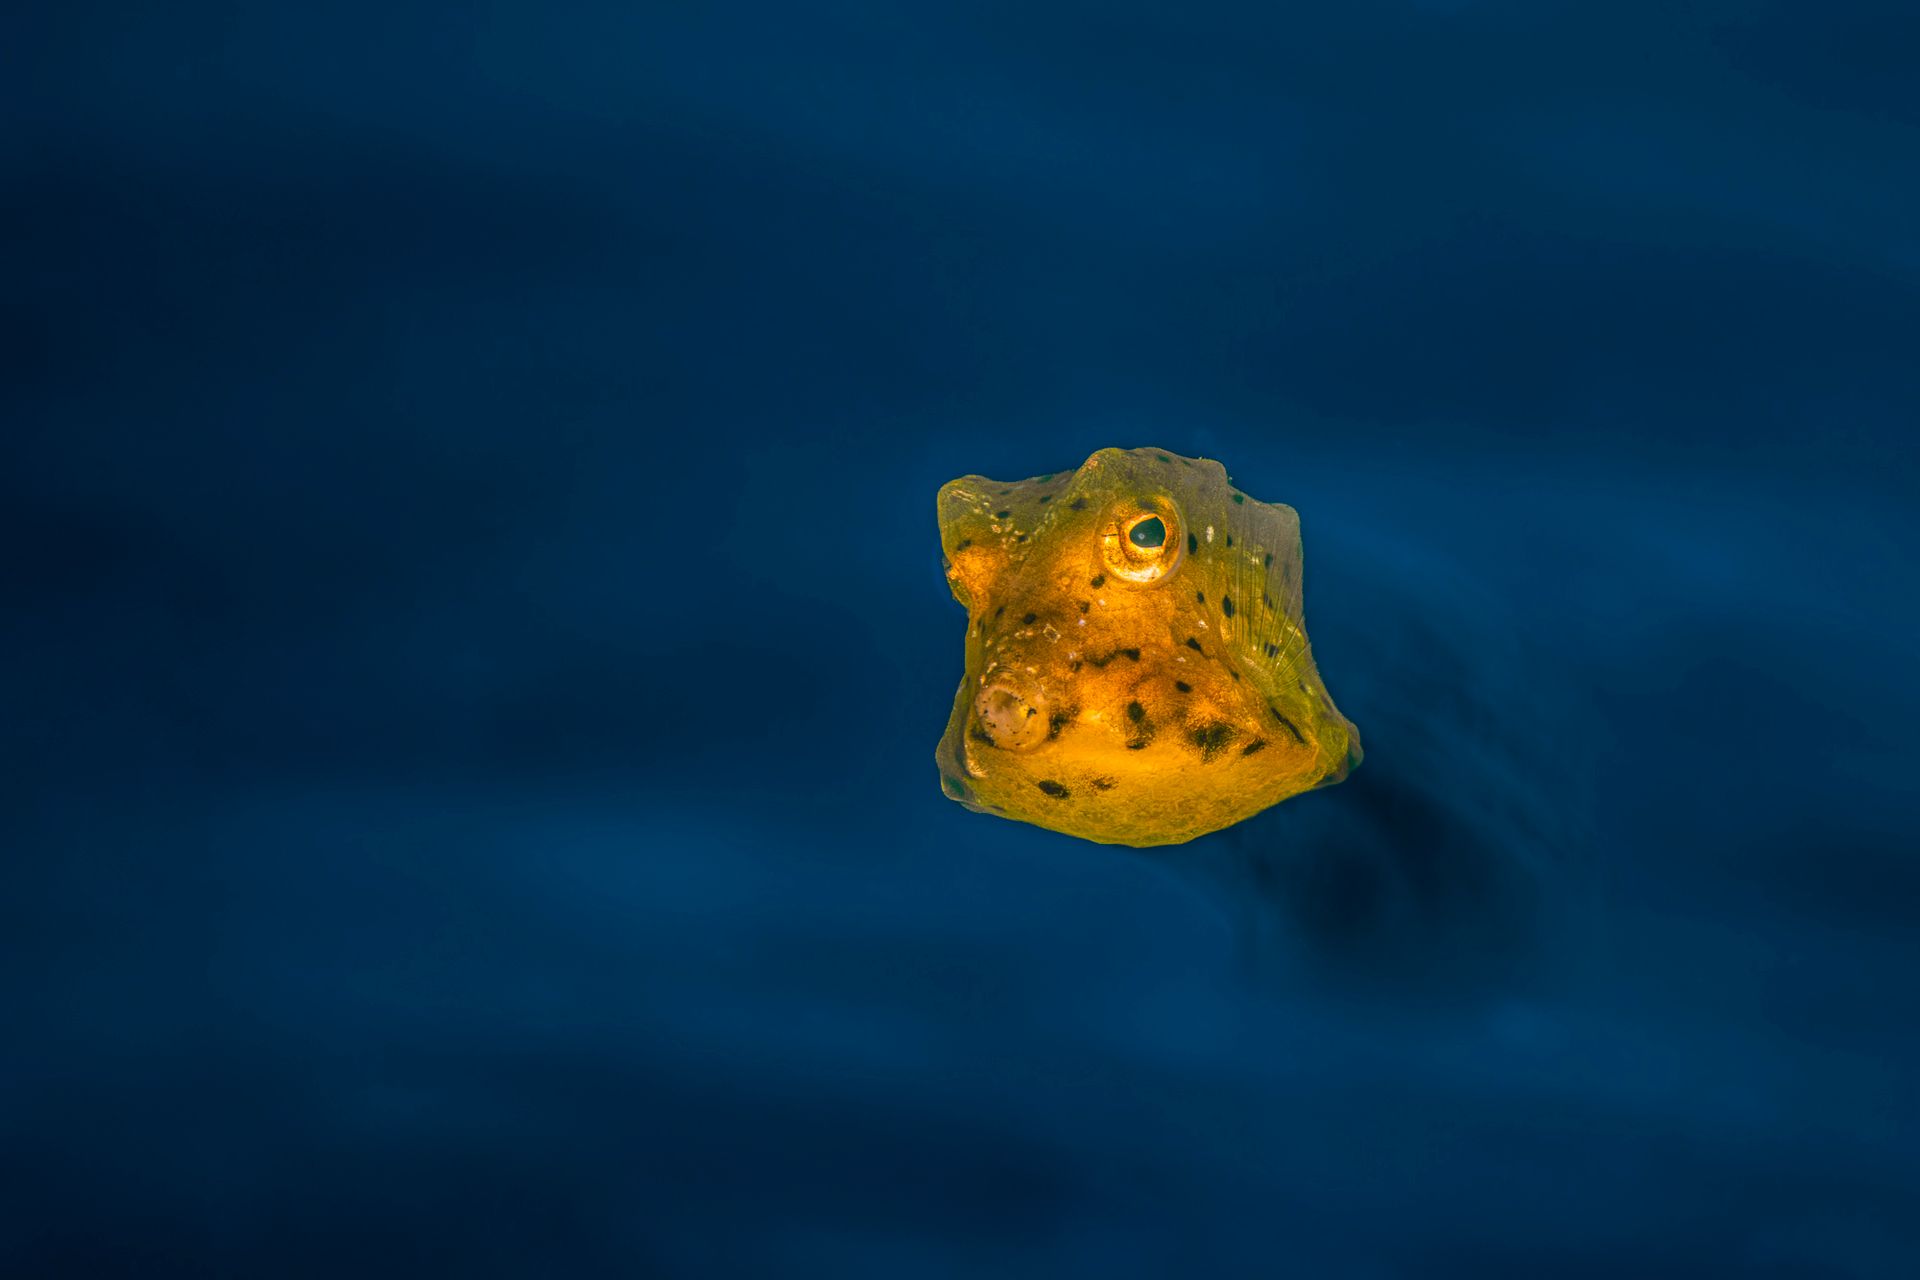
A snoot used to make the fish sharp, a slow shutter used to burn in some ambient light into the unlit parts of the frame
Creative Backgrounds
Creative backgrounds are another area where snoots excel when used with restraint. By using a subtle snoot for the main subject, you can then introduce separate lighting into your background. This allows you full control of the entire scene from front to back, enabling you to hide unsightly parts of the background and highlight only what you want—be that an artificial backdrop or a specific natural feature. The key here, again, is to control the size of the beam: always keep it narrower than the subject so you aren’t accidentally lighting the surrounding seabed.
Often, when shooting with separate backgrounds, you will want to use an open aperture to blur the background and create a nice, smooth bokeh. When doing this, you must manage the ambient light carefully; try starting with settings like f/2.8 and 1/200. Because the wider aperture lets in more light, you will also be able to further reduce the power of your snoot.

Backgrounds can be a subtle or a impactful as you like
Slow Shutter Speed Photography
One of the most overlooked uses for snoots is in slow shutter speed photography. Traditionally, slow-shutter techniques rely on ambient light to capture motion and a strobe to freeze the subject. Introducing a snoot into this equation adds a new level of control. By restricting the strobe light to the primary subject, you prevent unwanted illumination of the background, allowing ambient light streaks to remain clean and intentional. The subject stays crisp while the surroundings blur and flow; this separation between controlled strobe light and expressive ambient light creates images that feel dynamic without becoming chaotic.
Using snoots in slow-shutter work also encourages discipline. Because the beam is so focused, you must be precise with your composition and timing. There is little room for correction after the fact. This forces a slower, more deliberate shooting rhythm, which often leads to better images overall. The snoot becomes a tool for restraint, ensuring that only what truly matters is frozen by your strobe, while everything else becomes a silky blur. By choosing a snoot over traditional lighting, you avoid the "ghostly" frozen fragments of the background that often appear with standard strobe beams.

A snoot allows you to be very precise in which parts of the frame have light, and which parts remain exposed to the blur.
Challenges You Will Face
One of the challenges of using snoots more extensively is the increased complexity they introduce. Positioning becomes more critical, communication with a buddy or model becomes more vital, and missed shots are much more common during the learning phase. It is tempting to abandon the technique after a few frustrating dives, but persistence is key.
The learning curve is steep, but it levels out quickly once muscle memory begins to develop. The payoff is a level of control that fundamentally changes how you think about light and opens the door to incredible variety in your underwater photography portfolio.
Which Snoot is For Me?
Firstly, if you already own high-end strobes like the Retra Pro Max or the Backscatter HF-1, you already have incredibly powerful tools. Both manufacturers make dedicated optical snoots that attach directly to these strobes and are of exceptionally high quality—I recommend sticking with those. If you are looking for a stand-alone setup, the Backscatter MF-2/3 with Optical Snoot OS-1 is an excellent choice; it is lightweight, affordable, and very easy to configure. However, my preference is always to use a snoot on my primary strobes, as they offer more power for advanced techniques and help keep your luggage weight down.
Perhaps the most important shift when embracing snoots as a general tool rather than a niche effect is mindset. Snoots are not just for black-background spotlight shots; they represent a way of thinking about light as something that can be shaped, withheld, and suggested rather than simply applied. This mindset carries over into all forms of underwater photography. Even when you remove the snoot, you will begin to see light differently.
In the end, using snoots extensively is about subtlety and intention—the understanding that the strongest images often whisper rather than shout. When used thoughtfully, the snoot disappears from the final image, leaving behind photographs that feel natural, balanced, and quietly compelling. That is when you know the lighting is working: when no one notices it at all.
Snoots might test your patience but the results are worth it.
Reply