- Inside Scuba
- Posts
- Mastering Underwater Diver Photography: From Silhouettes to Close-Ups
Mastering Underwater Diver Photography: From Silhouettes to Close-Ups
Alex Mustard & Matthew Sullivan
April 05, 2026
By Alex Mustard and Matthew Sullivan
Photographing people underwater is a fundamental skill that transforms a simple image into a story. While many of us start underwater photography to capture exotic marine life, including divers adds human interest, a sense of scale, and depth to your compositions. In this article from The Underwater Photography Show, we also discuss how creating powerful images of scuba divers requires unique skills, such as meticulous attention to detail and a collaborative approach.
The Two Golden Rules of Modeling
Before diving into technicalities, we strongly recommend that every photographer must adopt these two guiding principles:
Be Grateful: Your model is giving up their own dive time to help you achieve your vision. Remember that you might be doing exactly what you want to be doing but your model is probably not, they are dedicating their dive for you.
Be Patient and Prepared: Get your lighting and framing 100% ready before asking the model to swim into the shot. A model who has to hold a pose for ten minutes while you fiddle with settings will quickly become cold, bored, and awkward.
The "No-Man's Land" of Positioning
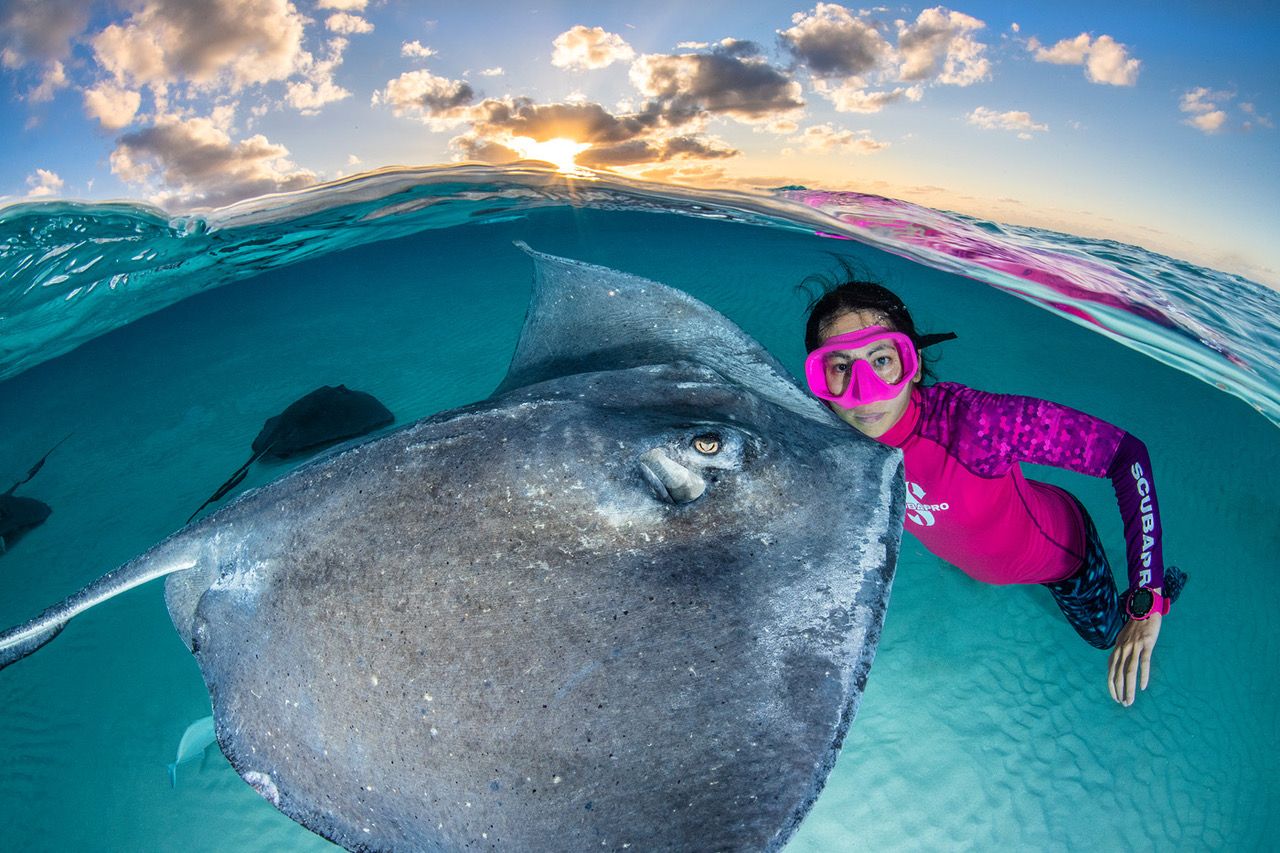
When planning your shot, it is vital to decide exactly where your diver sits in the frame. Successful diver photography generally falls into two distinct categories: the distant silhouette or the fully lit, close-up subject.
One of the most common mistakes is placing a diver in the "middle distance". If a diver is too far away for your strobes to reach effectively but not far enough to form a clean, dark shape against the background, and while the image will be fine, it won’t stand out. These "half-lit" shots tend to be frustrating because the diver loses the elegant lines and impact of a silhouette, yet the viewer lacks the flash-lit detail needed to connect with them as a subject. To create impact, you must commit to one extreme or the other.
The Dynamics of Current and Comfort
Another truism comes with comfort in current. Because model shots are usually taken facing each other, the current will be opposite for you and the model. In practice this means, if you are facing into the current and comfortable shooting, it is likely that your model will have that same current coming from behind them, making holding position awkward.
Always check and ensure the environment isn't compromising the model's ability to look relaxed; if they are struggling, it will show in their posture and expression. Since they are the one in the photo, it is often best to choose a set up with the current at your back, one that leaves you awkward and keeps them elegant.
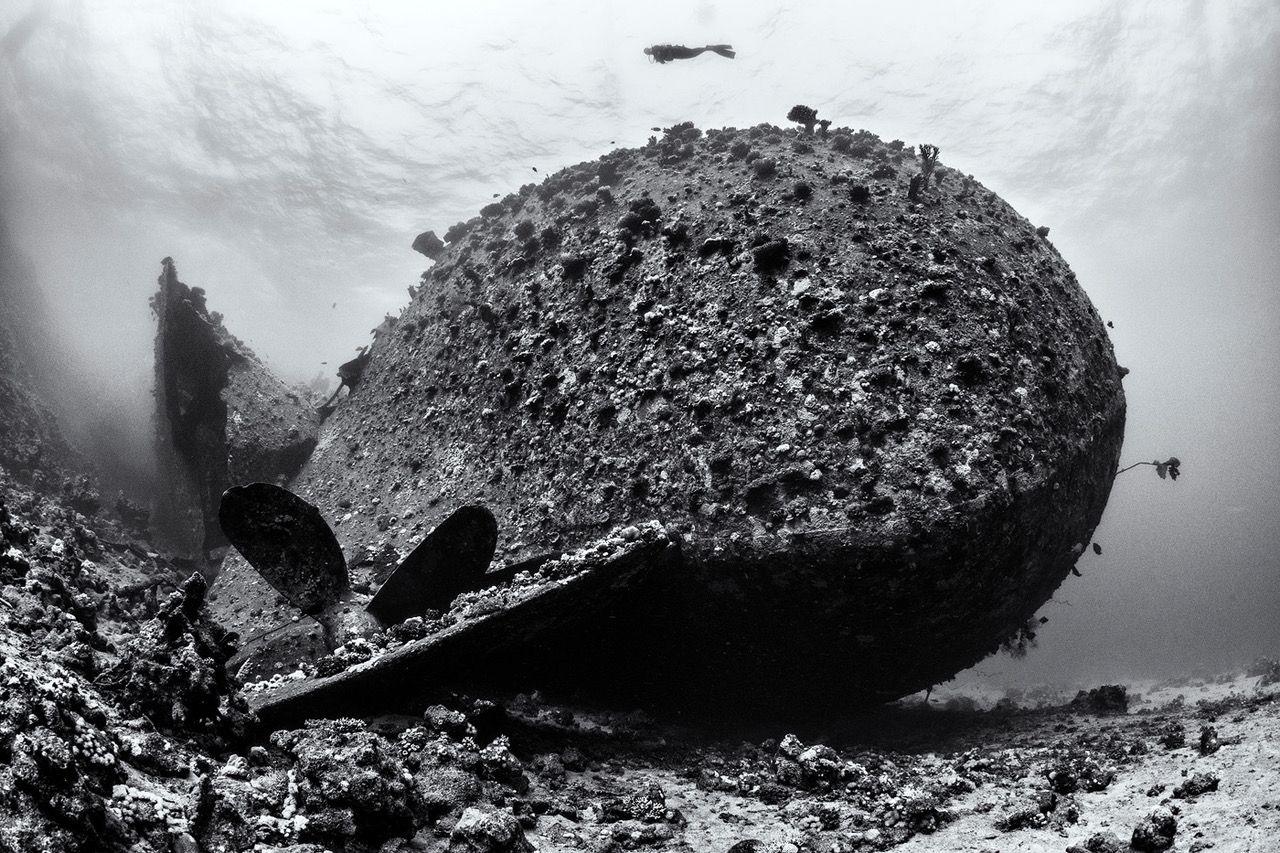
Part 1: The Silhouette Shot
Focusing on silhouette shots is highly recommended as a first step into
photographing divers. This style is more forgiving and serves as an excellent training
ground for both the person behind the lens and the one in front of it.
Why Silhouettes are the Ideal Starting Point:
Lower Barrier for the Model: It is much easier for a model to learn how to pose as a silhouette than to manage the complexities of a close-up shot. Models also tend to be less self-conscious when they are a distant shape in the frame rather than the focal point of a lit portrait.
Reduced Technical Demand: The challenge for the diver's skills—such as maintaining precise buoyancy and facial expressions—is less intense in a silhouetted shot.
Flattering Results: Silhouettes are naturally flattering for almost anyone.
Photographer Benefits: Acting as a background model yourself can make you a better photographer. By experiencing the modeling side, you learn exactly what information a model needs (and doesn't need) from the photographer.
Compositional Value: Silhouettes add a spectacle of scale, making foreground subjects look larger and more impressive while adding essential depth to the image.

Technical and Aesthetic Tips:
The Pose: Avoid a horizontal "trim" position with knees bent, which often looks squat and unattractive in photos. Instead, aim for elongated limbs and an upward swimming trajectory.
Rotation: Have the model rotate slightly toward the camera so their dive cylinder is visible.
Gear: Long fins look much more elegant than short, stubby "tech" fins. Streamlined gear, such as a backplate and wing, creates a cleaner silhouette than a bulky BCD.
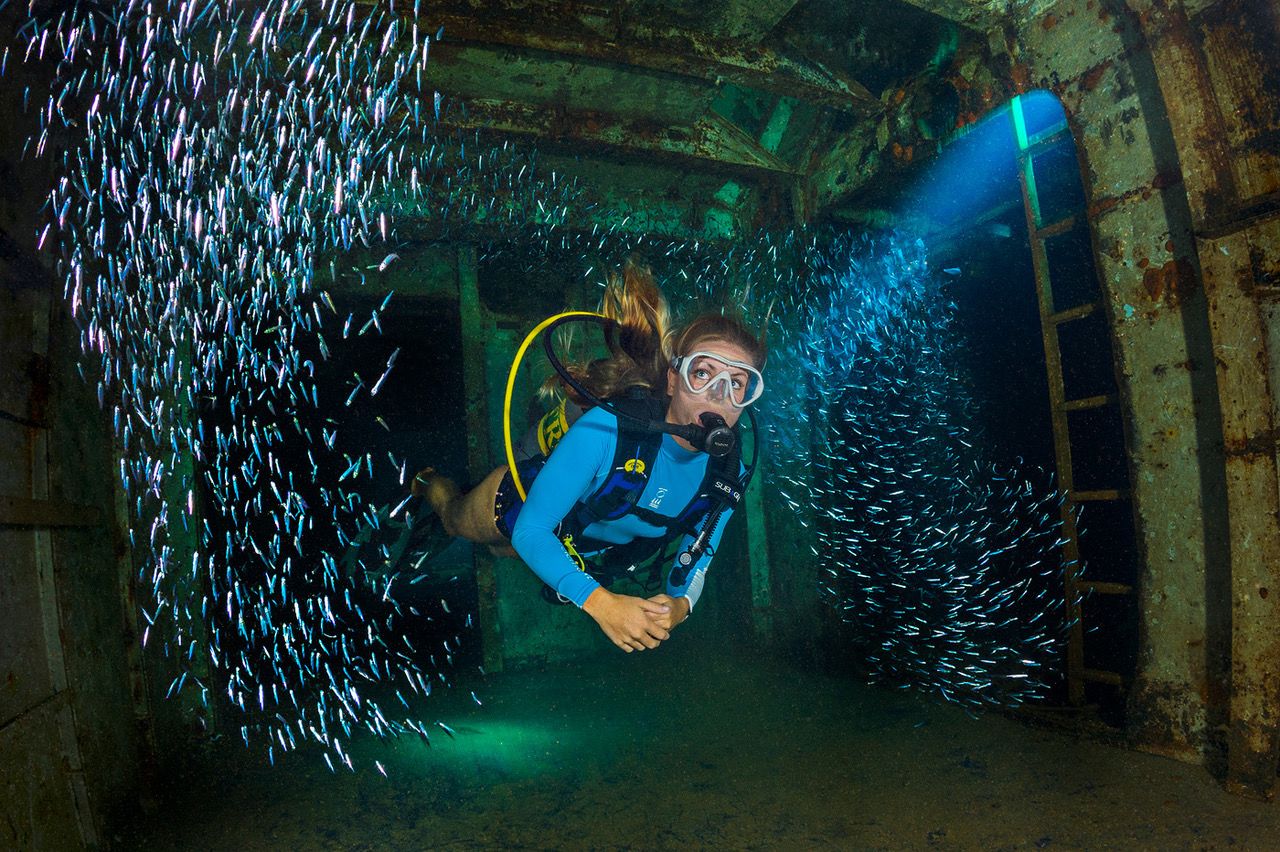
Torches: In dark environments like caves, wrecks, or during muck diving, a dive torch is a powerful tool to draw the viewer’s eye directly to the diver. A torch beam provides a "point of interest" that helps a dark shape pop against a dark background. The other advantage of using a torch in a distant silhouette model is that the model can often see the light of the torch in the dome port and it can help them position themselves.
Bubbles: If you are shooting a very wide scene where the diver is small in the frame, a well-timed exhale can be transformative. A few bubbles catching the light create a textured, bright element that helps the model stand out from the surrounding scenery, ensuring they aren't lost in a complex composition.
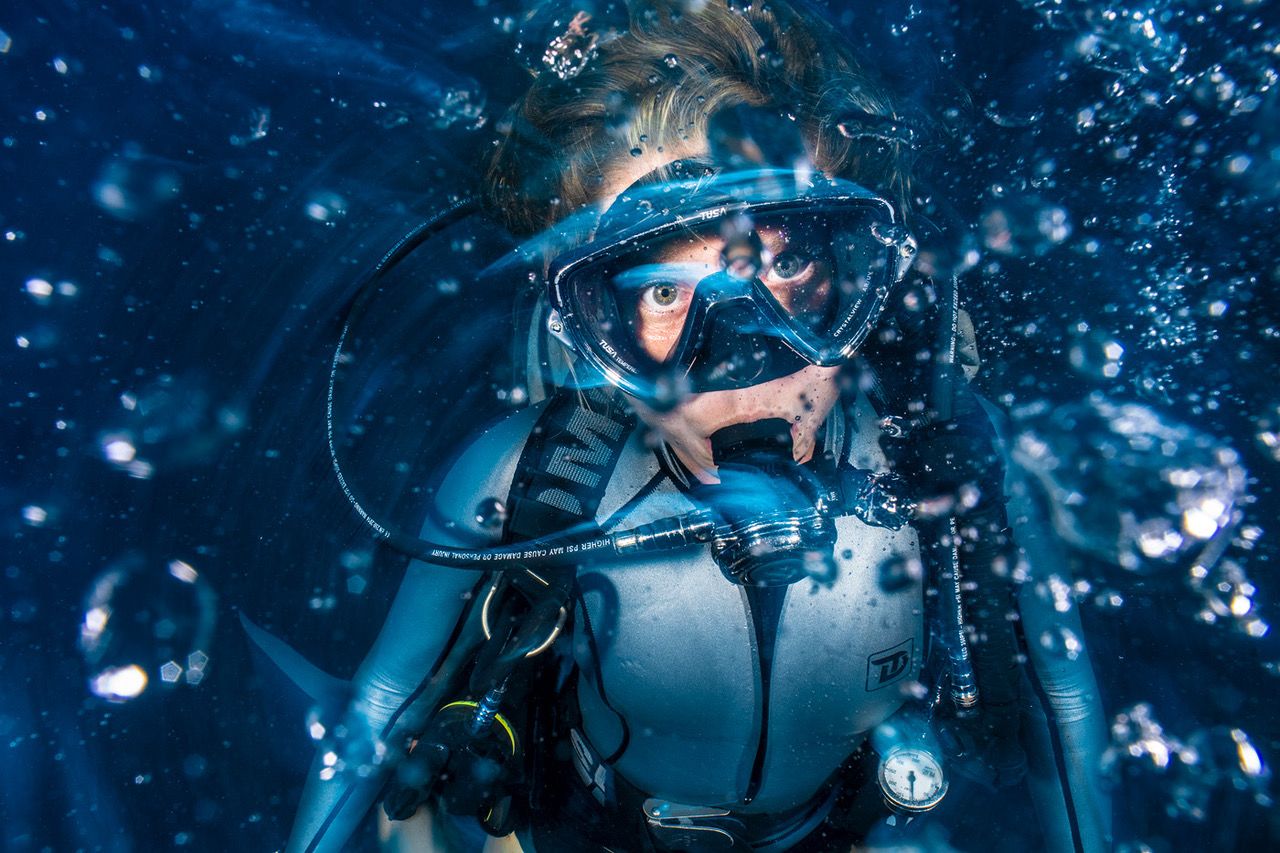
Part 2: Illuminated Close-Ups
Working up close with a diver is significantly more challenging because the viewer connects directly with the subject’s face and eyes.
Gear Choice: The Mask
Visibility: A single-lens mask is much easier to light than a low-volume, dual-lens mask, which creates heavy shadows around the eyes. This decision on mask choice occurs before the dive, so choose a single frame mask.
Color and Contrast: Beyond the shape of the mask, the color of the skirt and frame is a vital aesthetic choice. A clear skirt allows more light onto the face but are currently less fashionable. A colored frame can be used to pull a specific color through the image or even to highlight the model’s features. For example, selecting a mask color that matches or provides a striking contrast to the model's eye color can make the eyes truly "pop" in a close-up portrait.
Modernity: Ensure the model is using contemporary gear. Images featuring obsolete equipment, like old oval masks, are difficult to publish in modern diving magazines. And one of the main reasons for photographing people up close is for publication.
Safety: For a professional look, ensure the diver has all standard safety equipment, including a visible octopus.
Directing the Model
Directing a model requires good pre-dive and clear underwater communication, as minor details in the face and body significantly impact the final frame.
Eye Line: Instruct the model to face the camera so you can light their mask, but ask them to look at a subject within the frame rather than staring directly into the lens. If they are the foreground subject, have them look slightly above the camera, then straight down the lens.
Body Orientation: A common mistake is having the model swim straight at the camera. From the lens's perspective, this "foreshortens" the diver, making them look like a floating head with no body. Instead, have the model swim at a slight angle across the shot and then turn their head to the camera. This shows the length of the body and the gear, creating a much more pleasing and three-dimensional composition.
Hair Management: If the model has long hair, they should stay slightly in motion to prevent the hair from floating vertically, which looks unnaturally "posed".
Shooting Blind: Photographers should consider holding the camera out and watching the model over the top of the housing. This allows you to monitor their breathing and eye line in real-time, ensuring you catch the perfect moment between exhales. It can be hard to see eye lines of a model through the viewfinder.
A Creative Partnership
The challenge, but ultimately the satisfaction of underwater modeling is that it is a two-way creative process. What the model brings—their personality, elegance and comfort in the water—will dictate the style of the final image. To keep your models motivated, process a few "hero" shots quickly after the dive so they can share them with friends and family. When everyone is invested in the result, the images will reflect that shared passion.
To see the full episode, check it out here:
Reply