- Inside Scuba
- Posts
- Mastering Natural Backgrounds in Underwater Macro Photography
Mastering Natural Backgrounds in Underwater Macro Photography
Byron Conroy
December 28, 2025
Underwater macro photography is often taught as a subject-driven discipline. We are trained to find the critter, focus on the eye, manage strobe power, and move on. For many photographers, this approach works well enough to produce sharp records of small marine life. But if you look closely at the images that stay with you—the ones that feel complete rather than simply correct—the background is rarely an afterthought. In the strongest macro photographs, the background does as much storytelling as the subject itself. It provides context, balance, and visual flow. Mastering natural backgrounds is one of the biggest steps you can take to move your macro work from competent to compelling.
While this article is about natural backgrounds, I must preface it by saying I have used artificial backgrounds widely in my older macro photography work, and I still fully believe that mastering them is a helpful way to develop your understanding of backgrounds much faster. However, photography goes through fashions and trends. We’ve been through a period of gaudy-looking artificial backgrounds and come full circle back to a more natural style; a great natural background will always beat an artificial one.
A simple subject with a natural background and enough depth of filed to tell the story.
Why Backgrounds Matter More Than You Think
The background sets the emotional tone of a macro image. A perfectly sharp nudibranch against a cluttered or distracting background feels busy and unresolved. The same subject against a soft gradient of color or a clean natural texture suddenly looks deliberate. Backgrounds guide the viewer’s eye; they decide whether attention stays on the subject or wanders away. In underwater macro, the background also communicates habitat. A goby on clean sand tells a different story than the same goby framed by coral rubble or seagrass.
For experienced divers and photographers, this matters because you are no longer just documenting species. You are interpreting nature, behavior, and habitat. A natural background reinforces authenticity. It reminds the viewer that this animal exists within a living environment rather than floating in isolation. That sense of realism is something judges, editors, and seasoned viewers respond to instinctively.

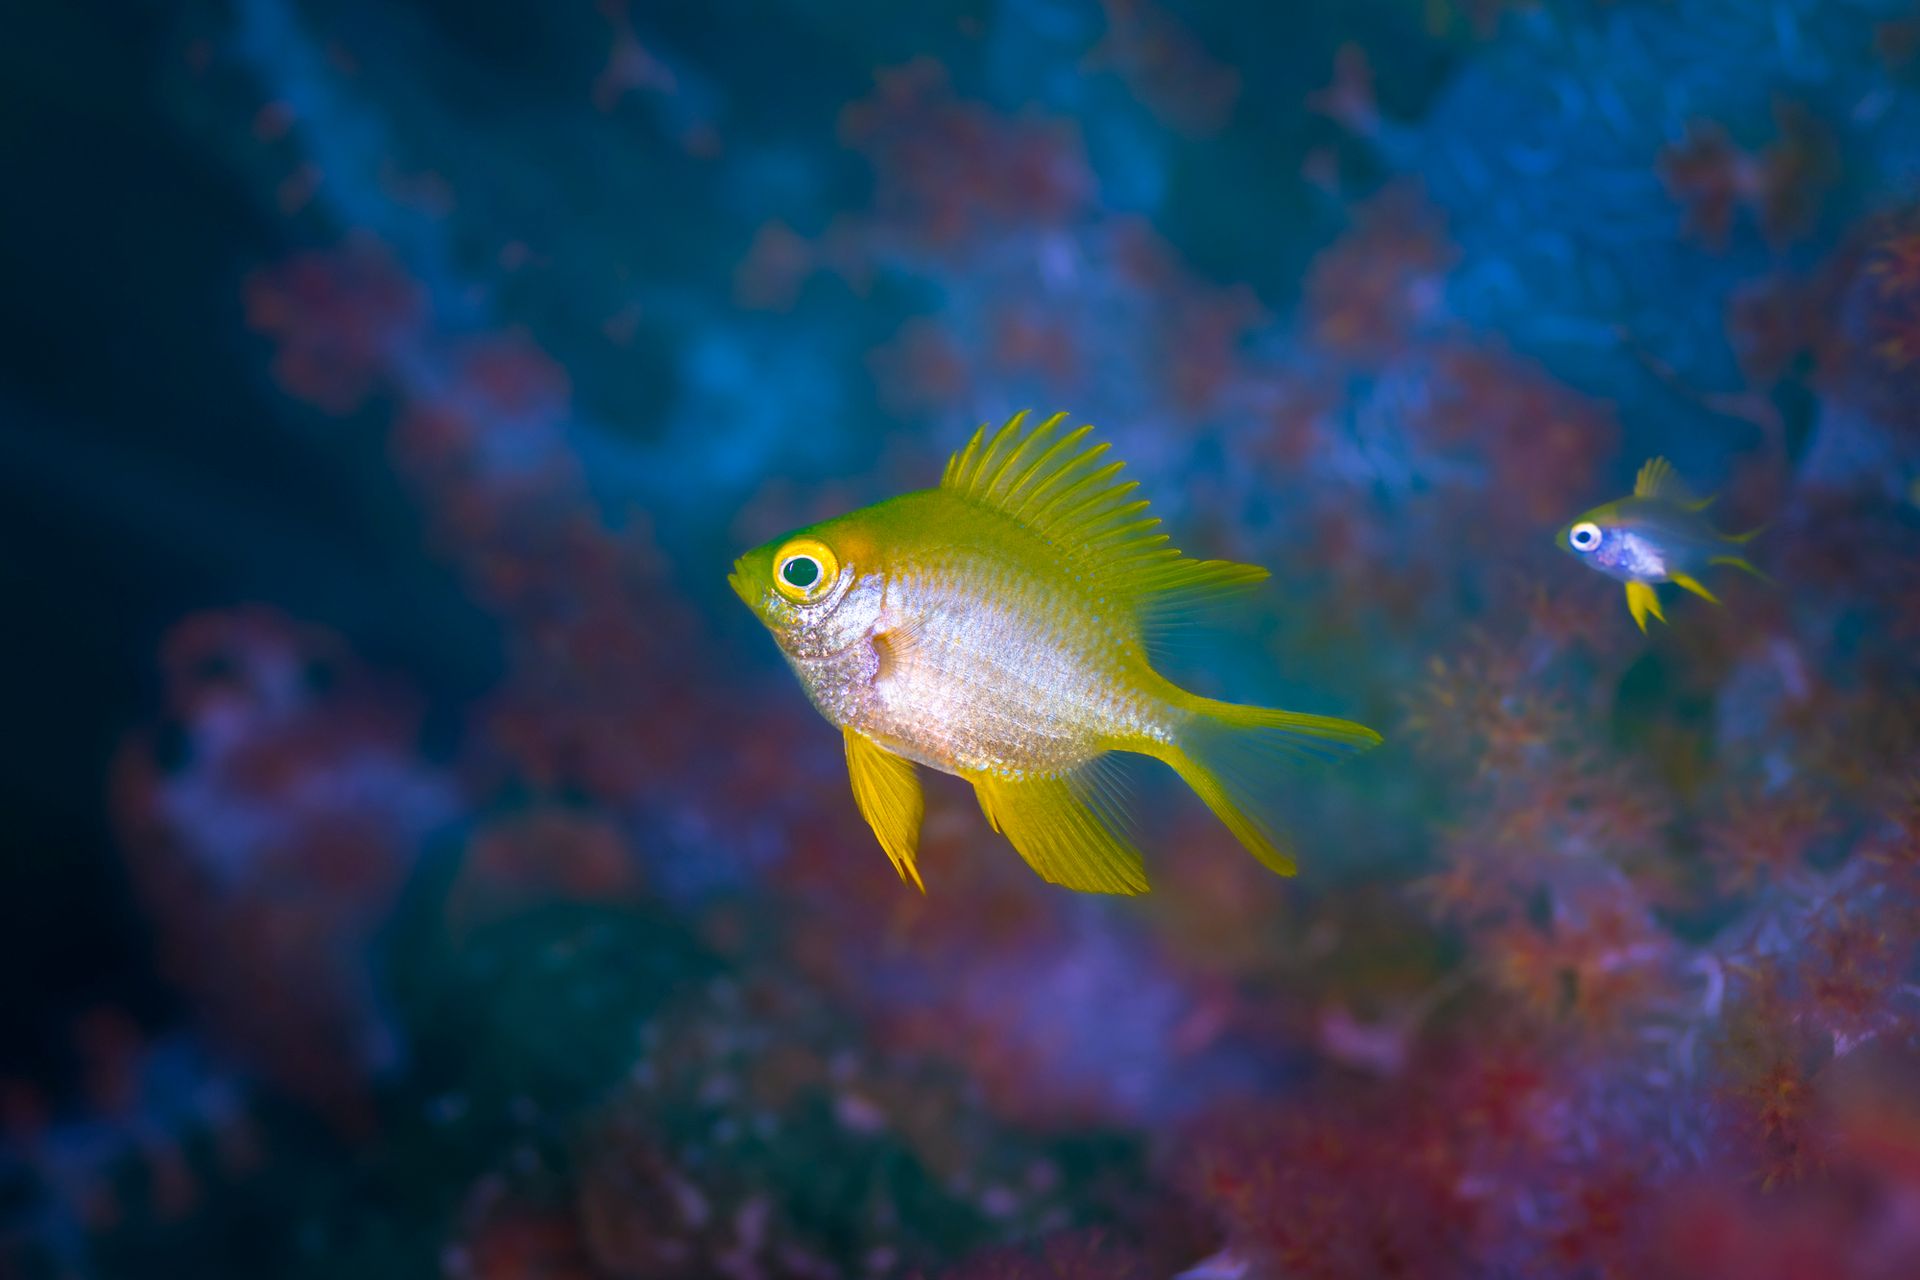
Matching color tones all provided by nature makes the image flow seamlessly
Identifying Backgrounds Before Subjects
One of the most effective habits you can develop is to look for backgrounds before you look for subjects. This sounds counterintuitive, especially when you are trained to scan for movement or shapes that indicate life. But underwater macro rewards patience and previsualization. When you spot a brightly colored sponge, a red anemone, or a blue tunicate, ask yourself simple questions: Is the background uniform or chaotic? Does it have a color that will contrast or complement a subject? Is there space for negative area? Can you position yourself to shoot slightly upward or across it rather than down into it? Once you identify a promising background, you then look for a subject that fits into that space. Often, the subject is already there, but you simply had not noticed it because you were focused on searching rather than composing.
This approach changes the way you move through a dive. Instead of swimming from subject to subject, you slow down and work specific areas. While macro photographers often search black sandy slopes, I now prefer to spend at least half of my dive in shallower, more rubble- and coral-dense areas where I know there will be far more natural backgrounds.
Coral rubble slopes can also work well, as the rubble and rocks often have colorful algae growing on them. By choosing your background first, you increase the odds that when you find a subject, the image is already halfway built.
The same applies when your guide finds you a cool subject; you should immediately take some time to search the area for a background before burying your head into the subject. The background is what will make your image spectacular.

I always get excited when I find such an exciting colored anemone, then wait for a subject.
Using Open Apertures to Blur Backgrounds
Aperture control is one of the most powerful tools for shaping backgrounds in macro photography. While depth of field is often discussed in terms of keeping the subject sharp, it is just as important for controlling how much of the background is rendered recognizable. Shooting at wider apertures allows you to separate the subject from the background by turning detail into color and tone rather than texture.
This does not mean shooting everything with incredibly wide-open apertures; the trick is balance. You need enough depth of field to keep critical parts of the subject sharp while allowing the background to dissolve. This is where knowing your lens and sensor combination matters. A longer macro lens will compress the background more and blur it faster, while a shorter lens will show more environmental detail. You would be surprised how many backgrounds look great shooting in the f/8 range. I almost never shoot at the f/16 or f/22 ranges, though; these apertures are better suited for when you are first learning to shoot macro or when you are using light separation techniques such as snooting or inward lighting.
Wider apertures are necessary when the background is close. Even a few centimeters of separation can turn a messy patch of substrate into a smooth wash of color if you shoot at f/2.8. The more distance there is between the subject and the background, the more you can close down the aperture to increase depth of field while still maintaining a blurred effect.
Positioning is critical here. Sometimes moving your housing just a few centimeters left or right will place the subject against a darker or lighter patch, which significantly changes the look of your background. Aperture choice then fine-tunes the effect. The goal is not to erase the background, but to simplify it until it supports the subject rather than competing with it.
In addition to using wide apertures, you can also build your images by layering different techniques. The image below is an example of how you can layer techniques onto a natural coral background.
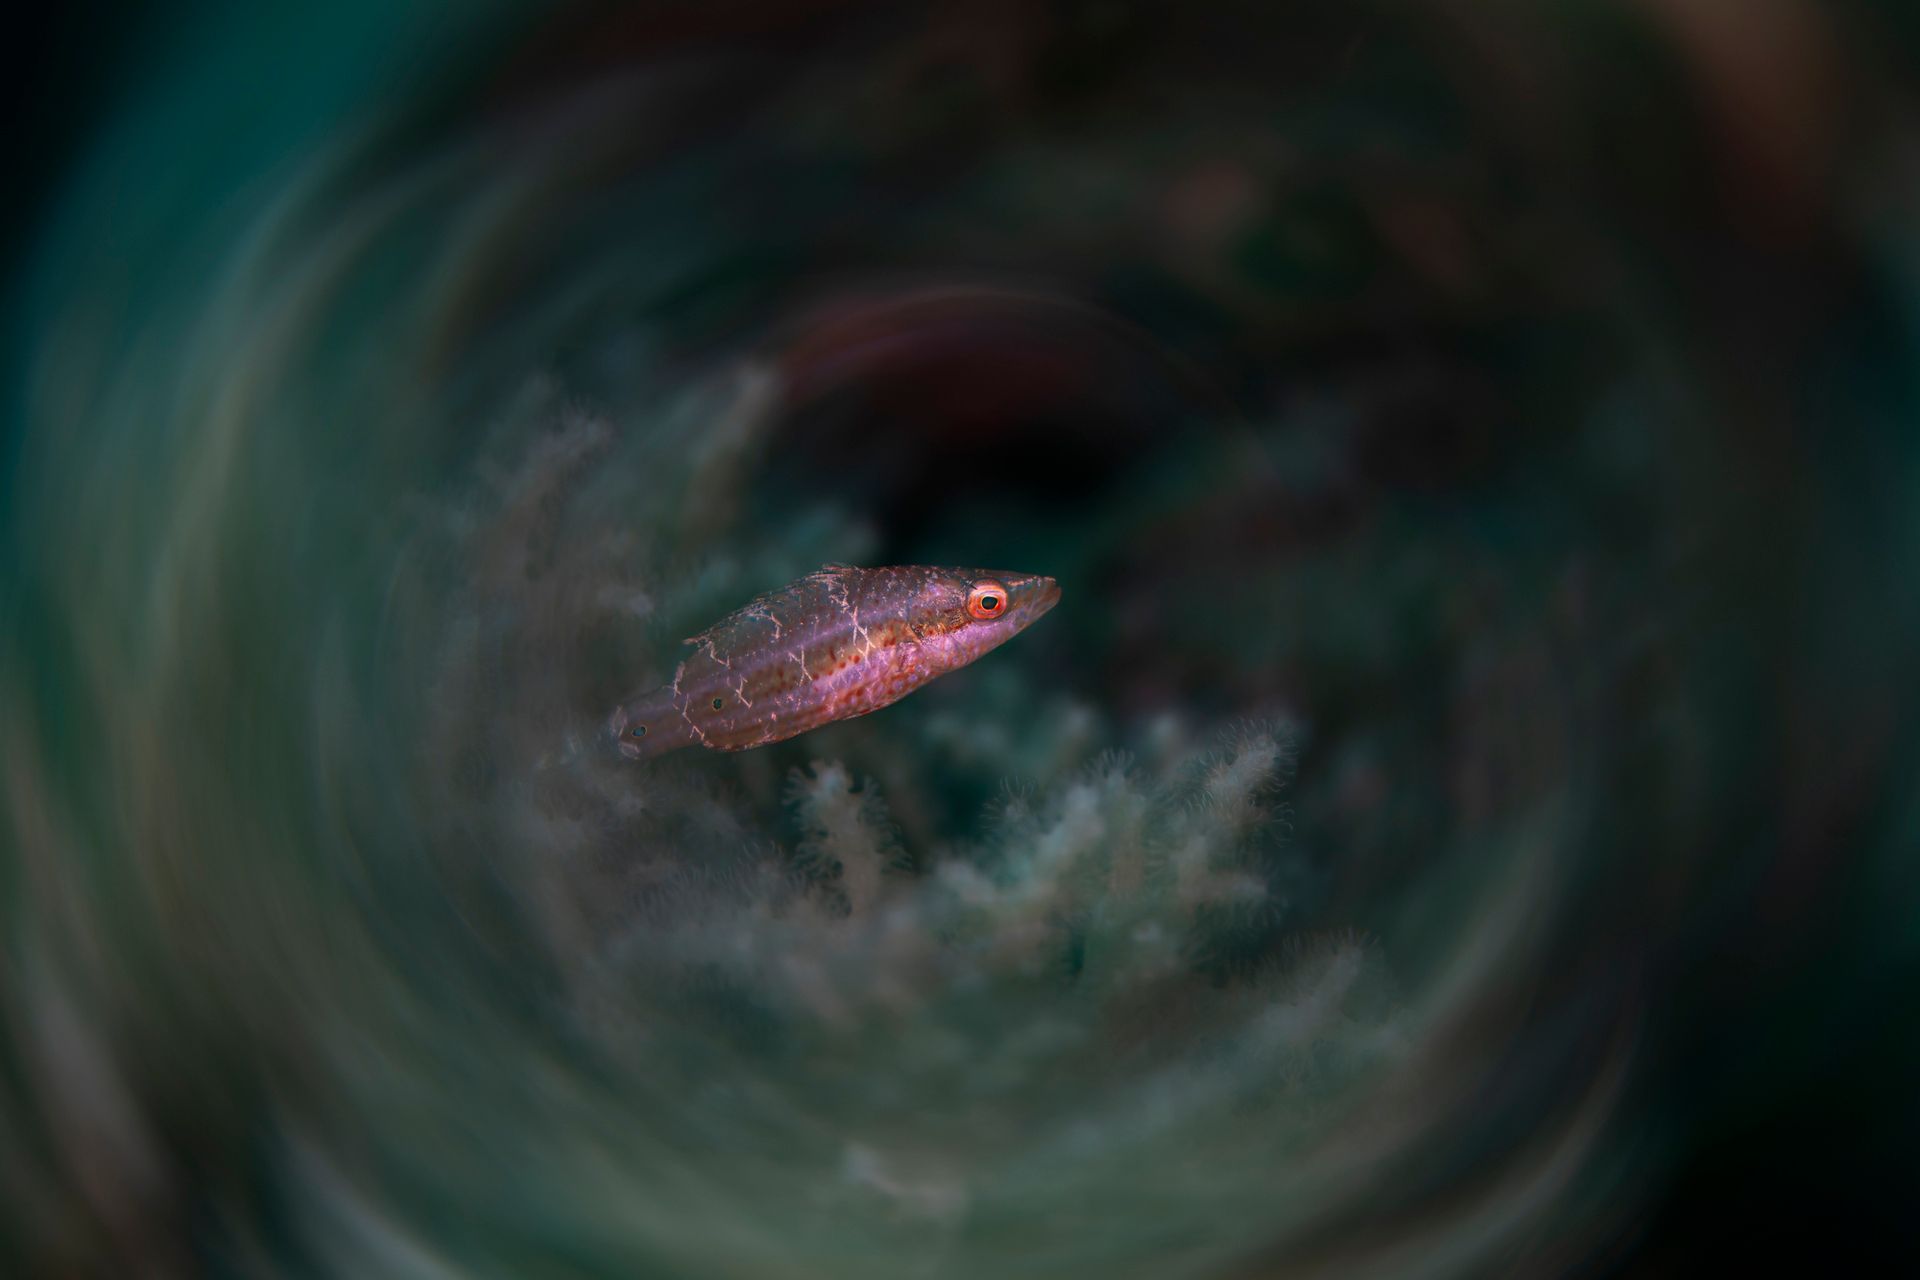
Layering up for more complex images.
Using Natural Habitats to Create Backgrounds
Natural backgrounds work best when they reflect where the animal actually lives. This may sound obvious, but it is often overlooked. Many macro subjects have preferred perches, burrows, or host organisms. These are not just convenient places to find them; they are opportunities to tell a fuller story. A shrimp emerging from its anemone or a goby framed by its burrow immediately feels grounded in reality.
When you find a subject, take time to observe its immediate environment. Look at what lies behind it from different angles. Often, the best background is not directly behind the subject but slightly offset. By changing your shooting angle, you can place the animal against seagrass, sponge, or open water rather than rubble. This requires buoyancy control and patience, but the payoff is significant.
Natural backgrounds also tend to have organic shapes and color transitions that feel more pleasing than uniform artificial tones. Algae-covered rocks produce subtle greens and browns. Sponges create rich reds and oranges. Sand gradients shift gently from light to dark. These variations add depth without distraction. They also age better visually; images built on natural backgrounds tend to feel timeless rather than trendy.

Using the natural barrel sponge to create the background.
Why Nature Outperforms Artificial Backgrounds
Artificial backgrounds have become popular in some macro circles. Black backgrounds, colored snoots, and staged scenes can produce striking images, but they often lack longevity. Natural backgrounds outperform artificial ones because they carry a complexity and authenticity that is difficult to replicate. Nature rarely produces flat color; even the simplest sand slope contains subtle variations that give an image depth.
Natural backgrounds also interact with light in more interesting ways. They reflect, absorb, and scatter light unevenly, creating transitions that feel organic. Artificial backgrounds tend to be uniform with repetitive patterns. While this can isolate a subject, it can also make the image feel disconnected from the underwater world. For experienced viewers, this disconnect is noticeable.
There is also an ethical dimension. Working with natural backgrounds encourages minimal disturbance. Instead of moving subjects or placing props, you adapt your technique to what is already there. This approach aligns better with responsible diving and photography; it rewards observation and patience rather than manipulation.
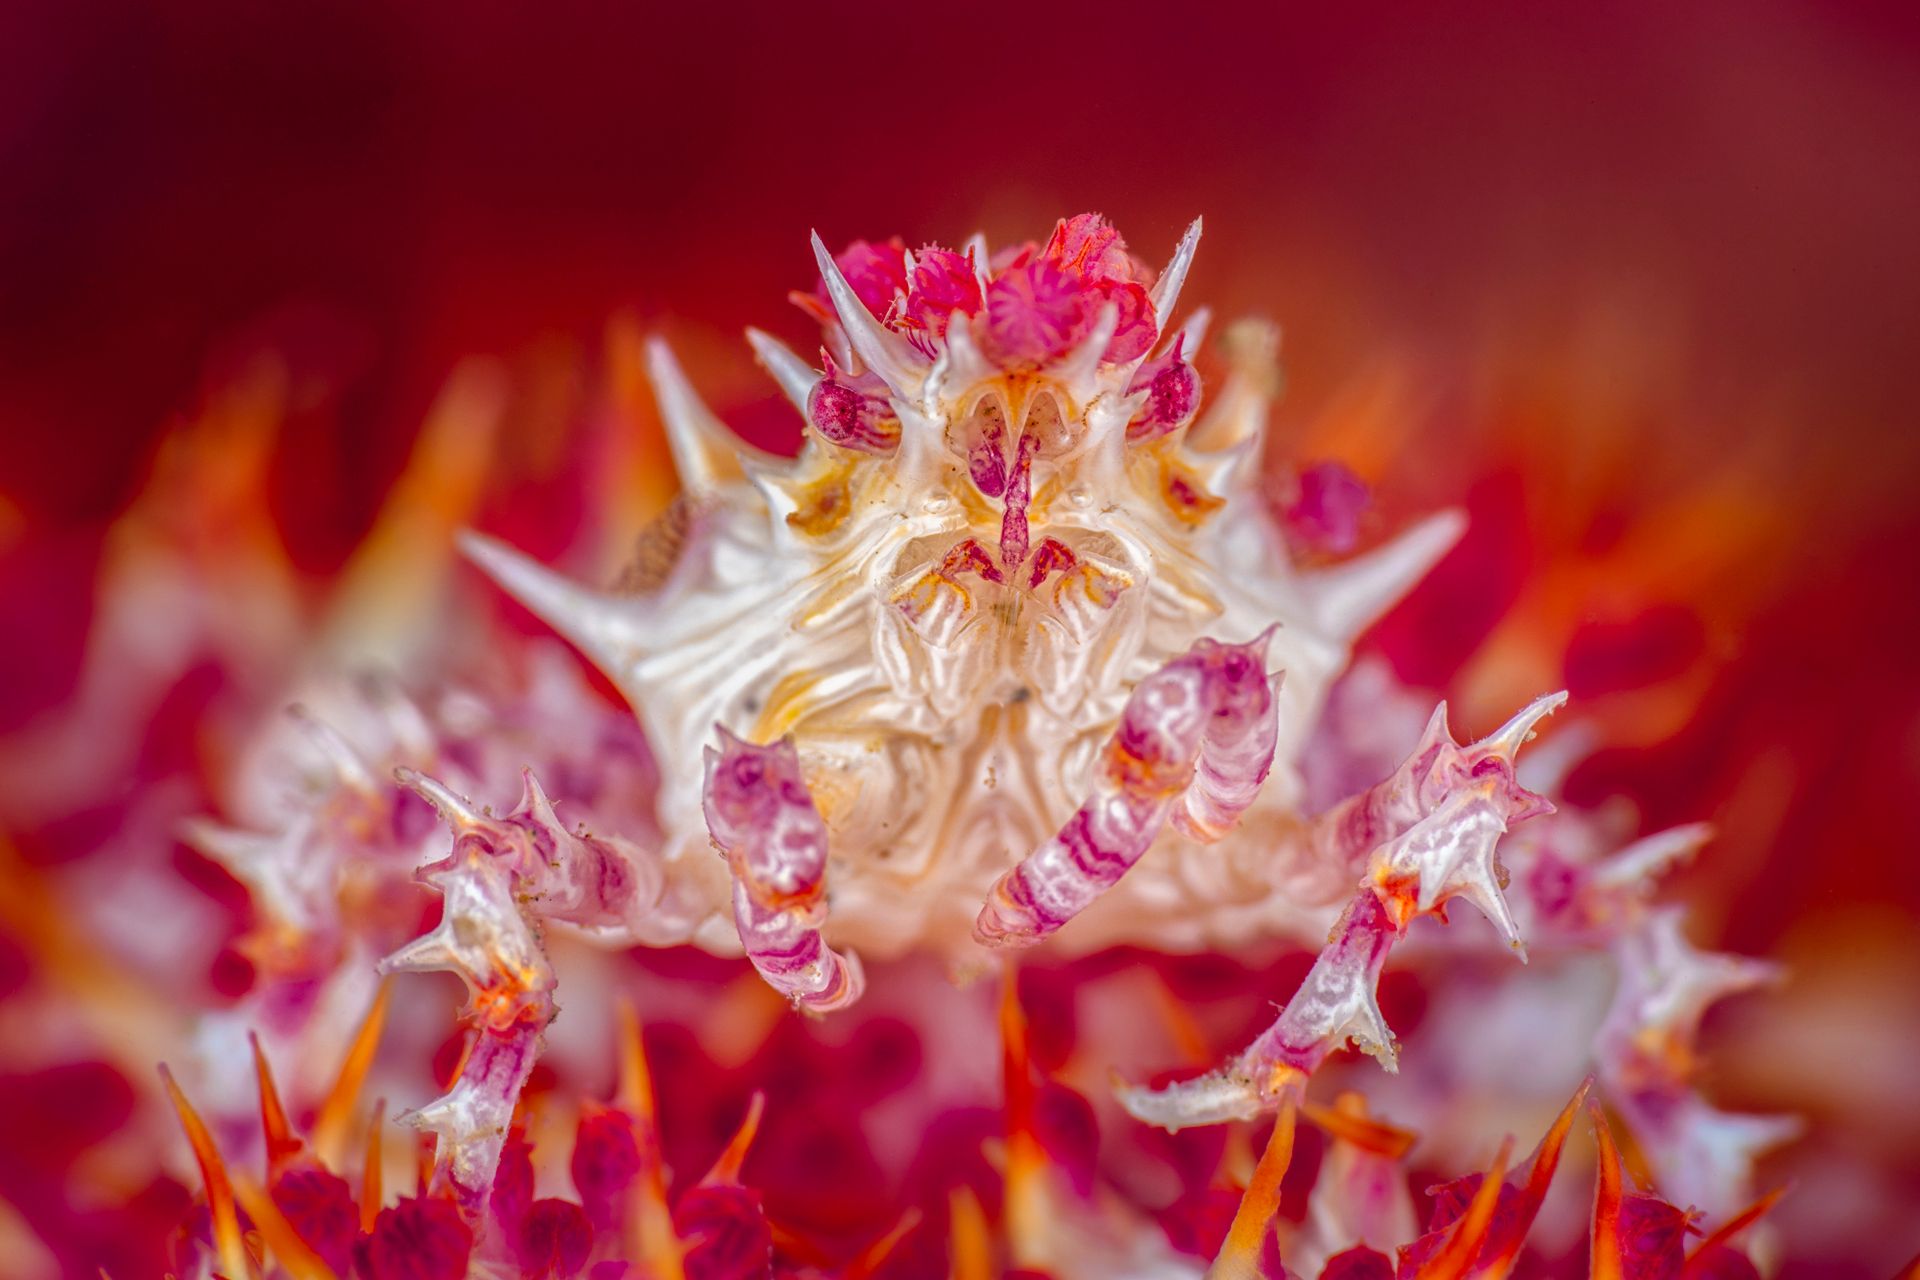
Soft coral crab, with a soft coral background.
Patience and Waiting for Alignment
One of the most overlooked skills in macro photography is waiting. Subjects move. Backgrounds change as animals shift position. A fish that initially sits against clutter may move a few centimeters and suddenly align with a clean, colorful background. If you rush, you miss this moment.
Experienced photographers learn to wait for alignment. This means staying still, controlling breathing, and watching how the subject interacts with its environment. It also means resisting the urge to fire immediately. Often, the best frame comes after several minutes of observation. When the subject and background align naturally, the image feels effortless even though it required discipline.
Waiting also allows behavior to unfold. A jawfish rising higher from its burrow or a shrimp extending its antennae can change the background relationship completely. By staying present, you increase your chances of capturing a moment where subject, behavior, and background all work together. With mantis shrimp, for example, I often sit and wait, looking through my viewfinder for that perfect moment when the shrimp rises from the burrow, tall and proud, and a natural background lines up behind it.

Waiting for the perfect moment on this minuscule anemone.
Simplifying the Frame Through Body Position
Background mastery is often more about moving yourself than changing camera settings. Small positional adjustments can dramatically simplify a frame. Dropping lower can place the subject against open water, while moving slightly higher can remove bright sand patches. Shifting left or right can eliminate distracting elements.
This requires excellent buoyancy and a keen awareness of fin position. You must be able to move without disturbing the substrate or the subject. Practicing these movements deliberately will improve not just your backgrounds but your overall macro work. It also reduces environmental impact, which should always be a priority.
Training Your Eye to See Backgrounds
Seeing backgrounds is a learned skill. At first, your eye is drawn to the subject. With practice, you start to see the entire frame as a single design. This comes from reviewing images critically. Look at your past work and ask why some images feel stronger than others. Often, the answer lies in the background.
Spend time reviewing images underwater as well. After taking a few frames, pause and look at the LCD. Ignore the subject for a moment and study the background. Is it supporting the image? If not, ask what you could change: angle, distance, aperture, or light. This habit builds awareness quickly.

A colorful coral makes for a unique background on a common subject.
Backgrounds As a Signature Style
Over time, the way you use backgrounds becomes part of your photographic voice. Some photographers favor soft, minimal backgrounds that isolate subjects. Others embrace textured habitats that tell ecological stories. Neither approach is right or wrong, but consistency matters. When viewers recognize your work, it is often because of how you handle space and the environment.
Natural backgrounds offer endless variation. They allow you to develop a style that feels personal rather than formulaic. By mastering them, you give yourself creative freedom without relying on artificial effects.
Conclusion
Mastering natural backgrounds in underwater macro photography is about seeing beyond the subject. It requires patience, observation, and an understanding of light, habitat, and behavior. By identifying backgrounds before subjects, using aperture creatively, working with natural habitats, and trusting nature to provide complexity, you elevate your images from subject ID shots to stories.
For experienced underwater photographers, this is where growth happens—not through new gear or more power, but through a deeper awareness of the environment you are already diving in. When subject and background work together, the image feels complete. In underwater macro photography, that sense of completeness is what keeps viewers looking long after the first glance.
Reply