- Inside Scuba
- Posts
- Shooting with Intent: Your Guide to Dramatic Black and White Underwater Images
Shooting with Intent: Your Guide to Dramatic Black and White Underwater Images
Byron Conroy
October 19, 2025
There is one major reason I'm not a huge fan of the vast majority of black and white underwater photography: people are usually converting poorly taken color images to black and white in order to save them. This bastardizing of black and white photography as an art form has led to the hobby being filled with a plethora of bad photos. But, if you can fight through some of the images we see posted, there is still an awful lot of value in a great shot, and it's a skill well worth having in your arsenal. If you can master the art, then you will be able to stand out from the crowd.
Black and white photography has a timeless appeal; stripping away color allows texture, contrast, and mood to come forward in a way that color images often struggle to match. Underwater photographers have embraced black and white from the earliest days of the hobby, long before digital sensors and editing software made it easy. Today, we can revisit that tradition with modern tools and a more deliberate creative approach, producing images that feel both classic and fresh.

A strong Black and White image is a powerful tool in your portfolio
The History of Black and White Underwater
The roots of underwater black and white photography reach back to the very beginning of the art. In the 1940s and 1950s, pioneers such as Hans Hass and Jacques Cousteau were working with cameras that could not effectively capture color film underwater. Their early explorations of reefs and wrecks were recorded in monochrome because it was the only practical option. These images, grainy and dramatic, captured the mystery of the underwater world and set the stage for generations of photographers. Even when color film improved and strobes became available, many shooters continued to prefer black and white for its ability to create a strong emotional impact. Looking at those early photographs today, you can see the power of simplicity. They remind us that composition and light matter more than technology.

A great black and white should draw the viewer in to another world
How to Make Stunning Black and White Images
Creating a striking black and white image underwater starts with the same fundamentals as on land. Light is everything, and contrast is your best friend. Because water absorbs light rapidly, and especially absorbs red and warm tones, you are naturally working with a narrow spectrum. Rather than fight that limitation, use it.
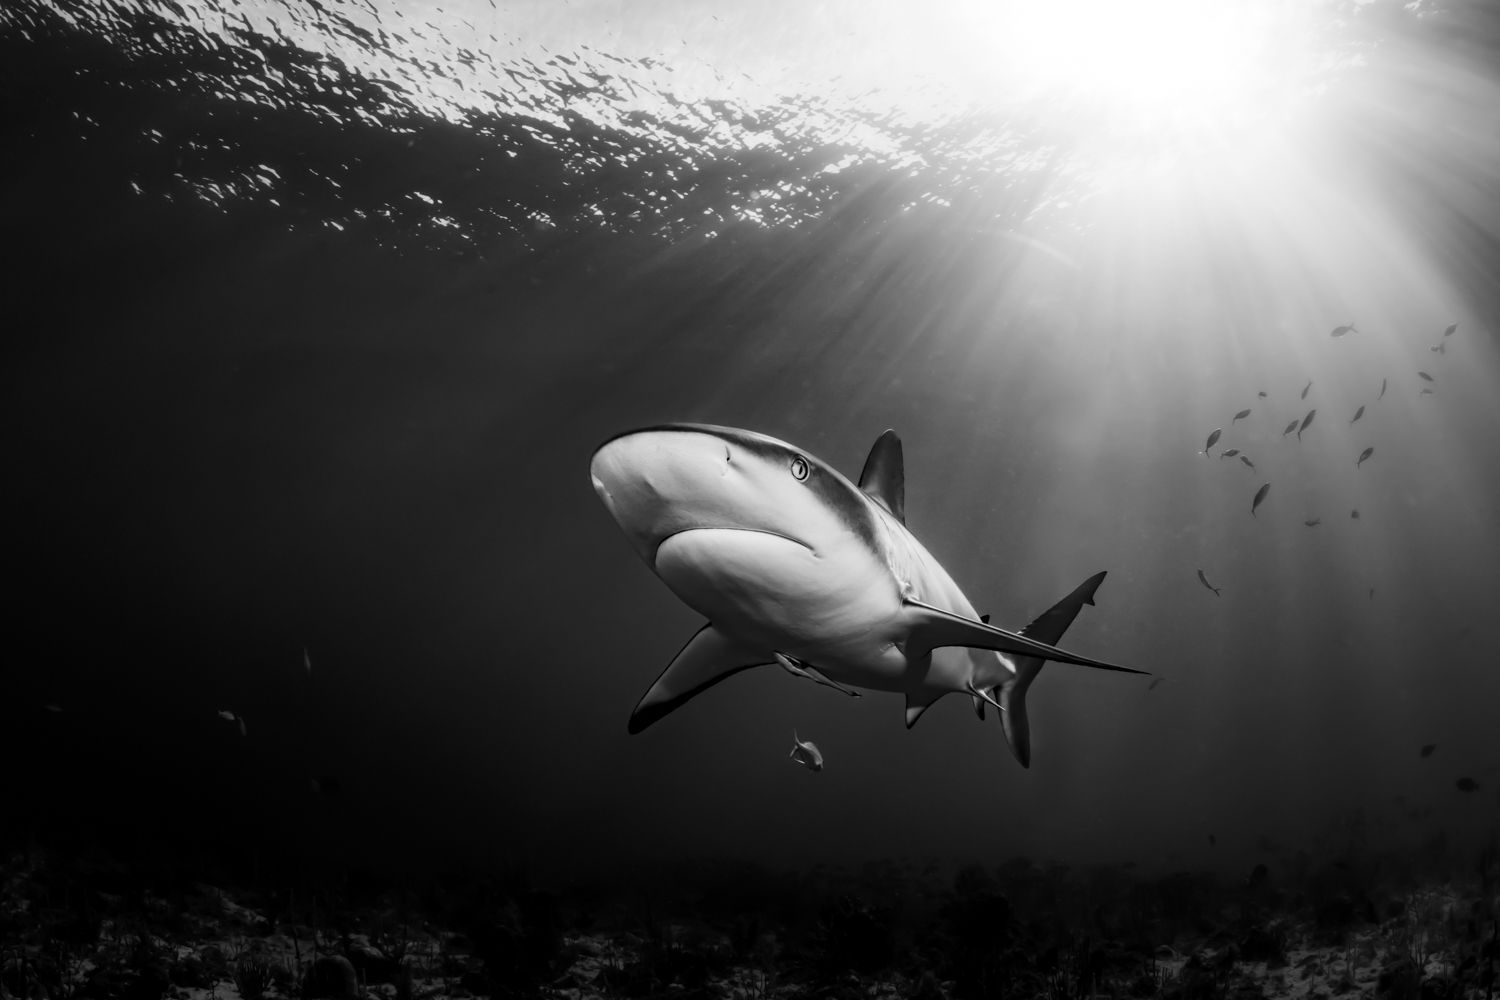
One of the most effective techniques is to position yourself so that you are shooting directly into the sun, which we call shooting against the light. By shooting into the sun, you will create silhouettes and large contrast in your image as it will be backlit by the strong ambient light.
Shooting into the light emphasizes the outlines of fish, divers, or coral structures. The human eye responds to these crisp edges, and the camera sensor records a natural gradient from highlights to shadows that translates beautifully into monochrome.
While ambient light plays the central role in this style, artificial strobe light can be used, but it often adds unnecessary distraction when you intend to convert the image to black and white. Your starting point should be to work with what nature gives you. Early morning and late afternoon dives provide softer beams and longer shadows that add depth.
In clear tropical water, you can even plan for midday when the sun is high and piercing. With this abundance of midday light, you can overexpose the blues and make the background ocean pure white in your images, making the subject pop.
Position your subject between yourself and the light, and allow the foreground to fall into silhouette. This approach creates natural contrast that requires minimal editing later.

Focus on using ambient light to flood your scene and then create natural silhouettes
Camera Setup
Today’s modern mirrorless cameras allow for a Black and White shooting mode, which means your viewfinder can be set up to show you only black and white. This makes it much easier to compose black and white images and understand the natural light as you are diving. When shooting in black and white mode, also have the 'settings effect' turned on so that when you change settings, you will also see the exposure of the image change.
As you change shutter speed, the "blues" of your image will get darker and brighter. In black and white, it means the background will become more white (brighter) as you slow down the shutter speed and let more ambient light in.
When shooting only ambient light, you can take off your strobes. This will also allow you to shoot at faster shutter speeds as you don't need to worry about sync speeds. Then, you can use a faster shutter speed to freeze subjects and use the Aperture and ISO to boost overall exposure.
Aperture will also allow more ambient light in when you open up, but be careful of the effect this will have in minimizing your Depth of Field.
With ISO, you will also introduce noise into your images as you increase it. Be careful not to push it past ISO 3200 or so, as it will start to introduce white specks into the darkest parts of your image.
Highlights and shadows are the end goal of Black and Whites
Composition, Texture and Detail
Composition is another key ingredient. Black and white thrives on strong shapes and textures. Look for coral heads with intricate detail, the repeating patterns of schooling fish, or the clean profile of a wreck's superstructure.
When shooting black and white, you are looking for simple scenes with strong, bold outlines and patterns. Avoid scenes with too much detail and too much going on within one background. Things that you regularly shoot, such as a busy coral head with a lot of anthias, have too much going on for black and white scenes. You're looking for much simpler and cleaner compositions.
Try to avoid scenes with many subjects in one frame. Instead, look for powerful and dynamic subjects that are bold and can be singled out easily.
Use strong lines in your images, such as diagonals across the frame. Lines such as reef edges, anchor chains, or beams of light guide the viewer naturally through the frame.

Natural leading lines and diagonals can help boost a Black and White image
Adding Strobe Light
You can absolutely add strobe light after you have learned to master the ambient light, especially off-camera strobe light. It works great to highlight key areas of an image. You can also use your strobe light to prevent an animal from being an all-out silhouette; by adding front flash light to the scene, you will bring out the details in the face. This can create a less dramatic shot, but one that is easier for the viewer to recognize.
Off-camera lights can work fantastically in black and white cave and wreck photos, for example, to enhance the shapes and textures and to backlight various subject types within a frame.
You are not, however, trying to overpower the ambient light; you are instead adding supplemental light to make things pop a little more. The ambient light must almost always be the star of the show.

Strobes can be used as fill light, but get the right ambient light first
Editing Workflow
Editing is where a black and white underwater image truly comes alive. Adobe Lightroom offers powerful tools to control the tonal range and bring out the drama in your shot.
Start by converting the image to black and white using the Basic panel. This removes the distraction of color and lets you focus on contrast and luminance. Adjust the Whites and Blacks sliders to set the overall dynamic range, aiming for rich blacks without crushing detail. Use the Shadows and Highlights sliders to fine-tune midtones. A gentle S-curve in the Tone Curve panel often adds the punch needed for a striking image. The Clarity and Texture sliders can enhance fine details in coral or sand, but use them carefully to avoid a harsh look.
Local adjustments are equally important. The Radial and Graduated filters allow you to manage different areas of the frame. Try using an inverted radial gradient to darken the edges with a subtle vignette that draws attention to the center. Use graduated filters to pull down over sun-balls and sunbeams to manage them accordingly.
The Adjustment Brush can be used to emphasize light rays or to deepen the black in a silhouette. Because ambient light underwater scenes often have haze or backscatter, the Dehaze tool is invaluable for cutting through the milky appearance and increasing contrast. Remember that black and white images invite a certain level of boldness. Do not be afraid to push contrast a little further than you might with color. The absence of hue allows the viewer to accept stronger highlights and deeper shadows.
You can also use the HSL panel to adjust blues; this will allow you to raise the intensity of the whites in the blue water background part of the image, in turn boosting overall image contrast.
One often overlooked aspect of editing is grain. A slight touch of grain can add a film-like texture that connects your modern image to the historical roots of underwater photography. In Lightroom's Effects panel, experiment with a small amount of grain and a low roughness setting. This can add depth and character, especially if you are inspired by the classic black and white work of the early pioneers.

Before and after a Black and White workflow
Conclusion
Black and white underwater photography is not just about removing color; it is about revealing structure, drama, and emotion that might otherwise be hidden. By shooting in black and white mode on your camera, you are shooting with intent and not bastardizing existing poor images in your portfolio. By using ambient light and careful composition, you can create bold and striking images. Editing with intention in Lightroom, you transform a simple dive snapshot into a work of art that stands the test of time. Whether you are a seasoned photographer or a new diver with a creative eye, embracing black and white can open a new dimension in your underwater work.

Combining techniques, ambient light, diagonals, off camera lighting, texture and contrast
Reply